We may earn a commission if you make a purchase through the links on our website.
Free SCP Server for Windows, Download & Install in Under 2 min
UPDATED: August 29, 2023
SCP Servers are used for all sorts of tasks, including updating firmware, transferring files to and from the internet and many other tasks that depend on SCP (Secure Copy Protocol).
SCP is the preferred method for transferring files for many website hosts as well, as it utilizes SSH protocol to ensure proper security, authentication and confidentiality during file transfer to remote hosts.
SCP runs on TCP Port 22 and all clients connecting to the server should be configured to use that port as well.
Let's quickly walk through the Process of Installing this Free SCP Server and getting it configured to accept incoming requests.
Download the SCP Server Software and Install
First off, head over to Here and Download the Free SCP Server package and lets get it installed on the machine that will act as the host.
Below you'll find step-by-step instructions to do so.
- Download this Free SCP Server package (Courtesy of SolarWinds)
- Extract the EXE file from the Zip file that was downloaded in step #1
- Double-Click on the Installer executable and follow the screenshots below to Install.
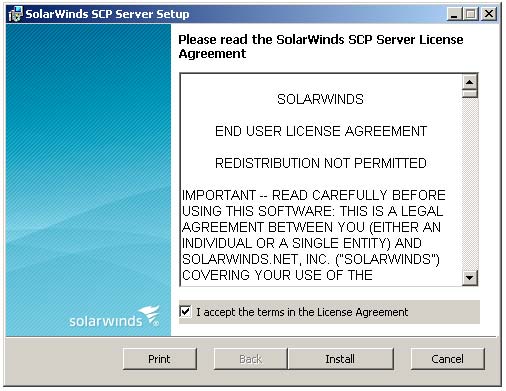
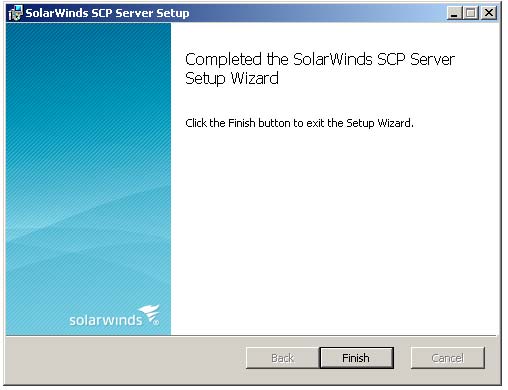
Check the box that says “I accept the terms in the License Agreement” and then Press the “Install” button to start the install. That's It! - The installation will Finish when you see the screen like this:
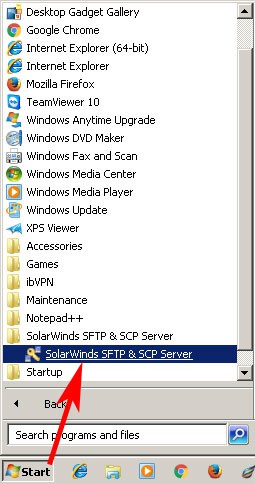
- Now open the Start Menu, Find “SolarWinds SFTP & SCP Server” folder, click on the folder and Click on “SolarWinds SFTP & SCP Server” program to start it.
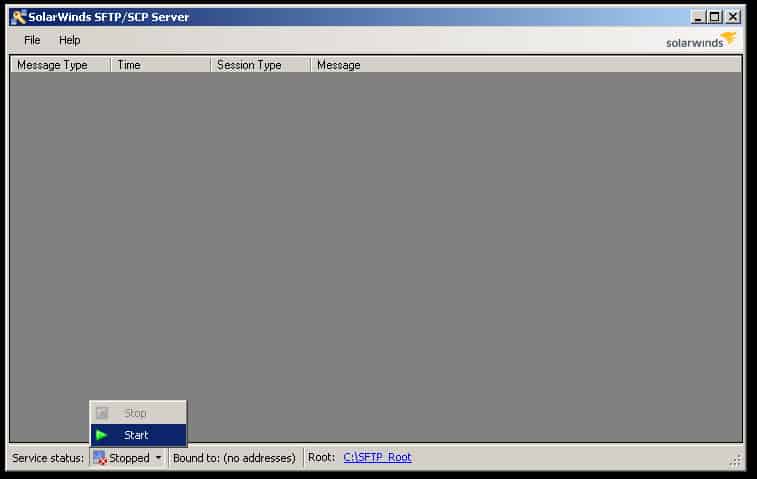
- When the program opens up, Make sure you that the “Service Status” at the bottom left corner is set to “Start“. (Our install was “Stopped” by default, so click the “Start” button to start up the server).
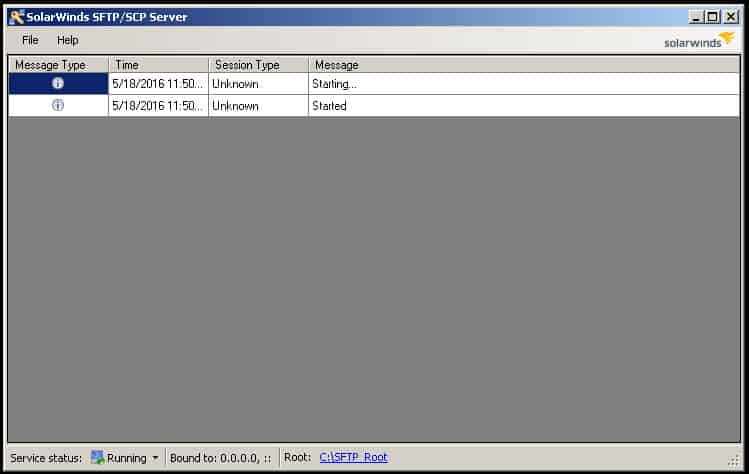
 You should now see the “Service Status” say “Running”.
- FINISHED! At this point, the Server is configured to accept SCP (and SFTP) connections and transfer. You can change further settings within the File > Config menu if you wish.
The server is ready to be used to transfer uploads and downloads to and from the server.
This is a very basic installation and no authentication has been setup or user accounts within the software itself, but we'll be using the Computer user account to log into it.
You'll also need to make sure that your Firewall is configured correctly, which we've detailed in the next section.
Related Post: What Is SFTP?
FIREWALL Configuration
If you have a Software firewall on the PC you installed the SCP Server on, whether the Windows Firewall or a different software firewall, you will need to allow Inbound Traffic on TCP Port 22. To do this on the Windows Firewall, follow the steps below:
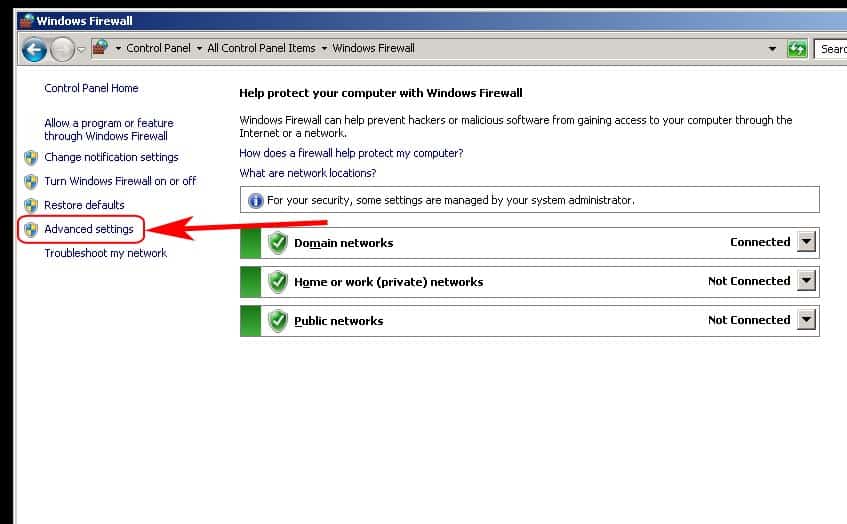
- Go to Start > Control Panel > Windows Firewall > on the left-sidebar menu, click “Advanced Settings” link.
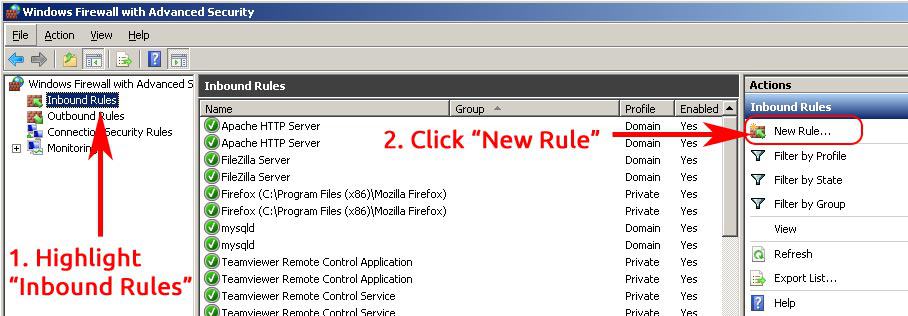
- When the Advanced Firewall Settings window comes up, (1.) Highlight the “Inbound Rules” link on the left-sidebar menu and then (2.) click the “New Rule…” link on the right-sidebar menu as seen below in the screenshot.
- The “New Inbound Rule Wizard” will now start. Follow the remaining steps below to Properly configure your Firewall to allow incoming Traffic on port 22.
- Choose “Port” at the first screen and click Next
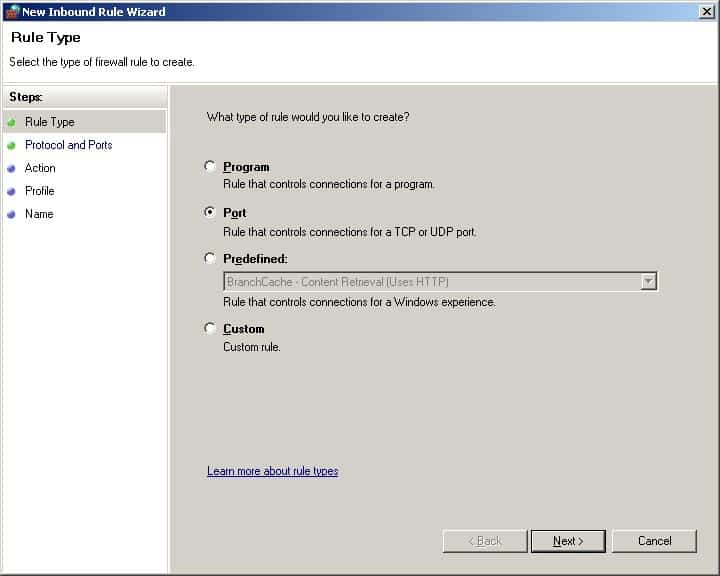
- Then choose “TCP” and check the “Specific local ports:” box and enter 22, as seen below, then Click NEXT
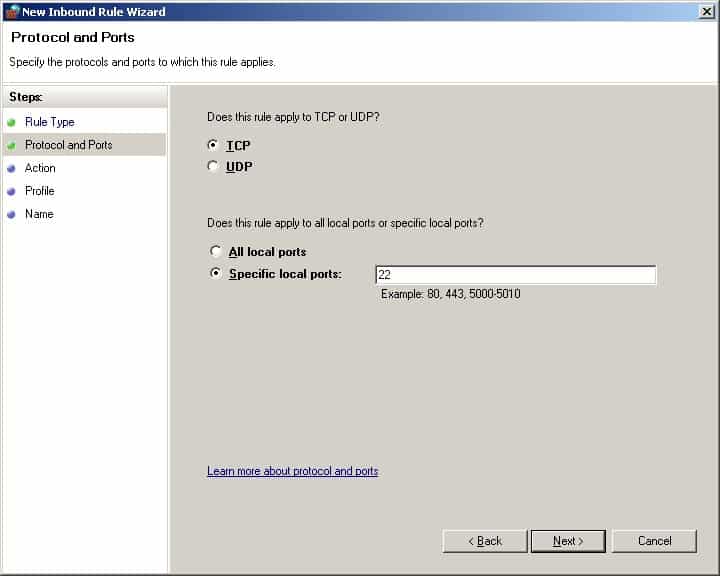
- Check the “Allow the connection” check box and click NEXT
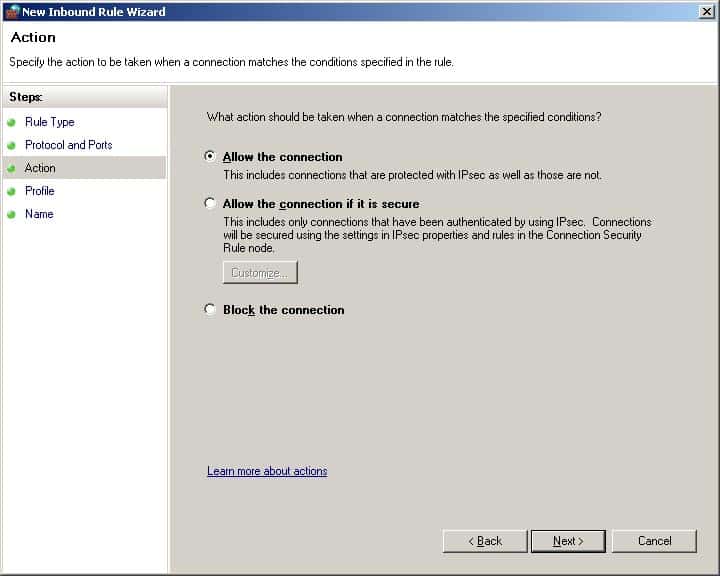
- Check the Boxes for Domain, Private and Public and click the NEXT
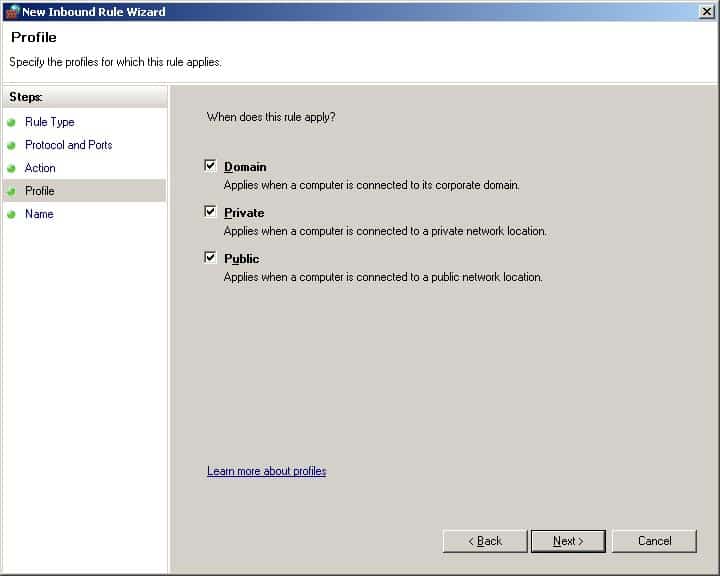
- Enter a name for the Firewall rule, ie: SCP Server Port Forward and click FINISH
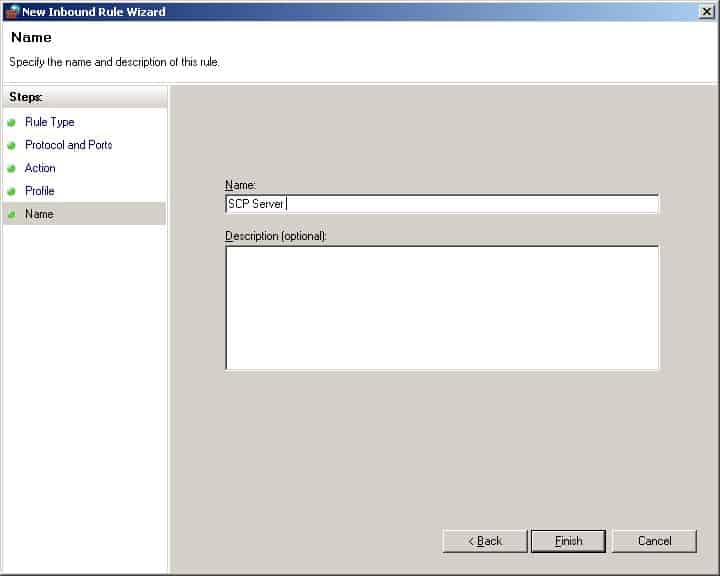
- Choose “Port” at the first screen and click Next
- FINISHED! You have no configured your computer to accept traffic on TCP Port 22.
If you want to access this server from the Outside world, you'll need to ensure that you setup a port forward on your Firewall to forward all SCP Traffic (TCP Port 22) to the computer with the SCP Server software.
Testing Connection with WinSCP
The final step of the process is to test the Server software and ensure that you can connected to it with WinSCP client, which is our favorite SCP, SFTP, FTP client.
Head over to WinSCP.net and download and install the latest version.
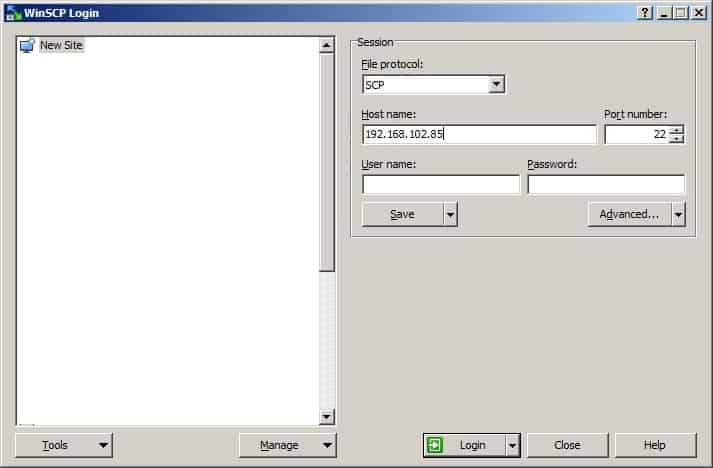
After the installation of WinSCP is complete, open the program and enter in the Information of your server below, as follows:
- File Protocol: SCP
- Host Name: IP Address of your SCP Server
- Port Number: 22 (the port number will already be set to 22)
- User name: Enter the username you use to log into the Server with
- Password: Enter the password for the user from above
You will See a Certificate Security prompt when first connecting to the server that will look like this:
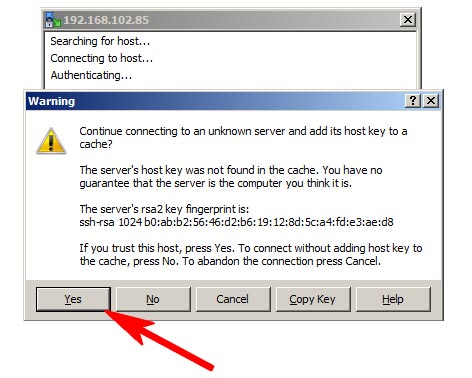
Click the “YES” button to store the RSA key in your local cache, so you don't have to worry about accepting every time you log in.
At this point, you should see your Root folder on the SCP Server, where you can host files or upload/download files as needed.
Its as simple as that, you now have a server setup and ready to file transfer.
Make sure you follow the directions we've highlighted for port forwarding the correct ports onto the IP address of the Windows PC you've installed the server software on and you shouldn't have any issues.
SCP Server for Windows FAQs
What is SCP Server for Windows?
An SCP Server s a software application that allows users to transfer files securely between computers using the SCP (Secure Copy Protocol) protocol. It allows you to transfer files securely between a Windows PC and a Linux or Unix system.
Can I use SCP Server for Windows to transfer files to a Linux or Unix system?
Yes, you can use SCP Server for Windows to transfer files to a Linux or Unix system. The SCP protocol is supported by both Windows and Linux/Unix systems, so you can use SCP Server for Windows to transfer files between these systems securely.
Can I use SCP Server for Windows to transfer large files?
Yes, you can use SCP Server for Windows to transfer large files. The SCP protocol is designed to handle large file transfers, so you should be able to transfer large files without any problems. However, it's always a good idea to check the maximum file size the server can handle, to avoid any issues during the file transfer.


 You should now see the “Service Status” say “Running”.


